With this tutorial, I will try to give you the steps to build the Apache Jakarta Connectoralso know as mod_jk2, as an RPM binary package from source.
1) Follow Thomas's instruction on howto create rpmbuild directory
2) We need to modify some system files, therefor become root
[casper@localhost casper]$ su -
Password:
[root@localhost root]#
3) Install Sun JVM or any other JVM which is 1.4.1 compliant (or newer).
Make sure that you install JSDK (Java Software Developer Kit) as Jakarta Tomcat requires this.
Make sure to create a enviroment variable for JAVA_HOME, the easiest is to add it to /etc/profile
# echo "JAVA_HOME=<root directory where java was installed>" >> /etc/profile
# echo "export JAVA_HOME" >> /etc/profile
#
Make sure the it is included in the path (not compleatly need but nice to have)
# echo "PATH=$PATH:$JAVA_HOME/bin" >> /etc/profile
# echo "export PATH" >> /etc/profile
4) Install Jakarta Tomcat 4.1.x.
Download it from http://jakarta.apache.org/site/binindex.cgi
and save it to /opt
Extract it:
# cd /opt
# tar zxfv jakarta-tomcat-4.1.29.tar.gz
....
#
Just to make your life easier make a symbolic link to it
# ln -s jakarta-tomcat-4.1.29 tomcat
#
Create a start script for jakarta Tomcat in /usr/local/bin
# vi /usr/local/bin/run-catalina.sh
i
#!/bin/bash
JAVA_HOME=<root directory to where ever you installed java>
TOMCAT_HOME=/opt/tomcat
PATH=”$PATH:$JAVA_HOME/bin:$TOMCAT_HOME/bin”
$TOMCAT_HOME/bin/catalina.sh $*
esc
:wq
Try it out....
# catalina-run.sh run
Using CATALINA_BASE:   /opt/tomcat
Using CATALINA_HOME:   /opt/tomcat
Using CATALINA_TMPDIR: /opt/tomcat/temp
Using JAVA_HOME:       /opt/java
Jan 15, 2004 11:58:29 PM org.apache.coyote.http11.Http11Protocol init
INFO: Initializing Coyote HTTP/1.1 on port 8080
Starting service Tomcat-Standalone
Apache Tomcat/4.1.29
...
INFO: Starting Coyote HTTP/1.1 on port 8080
Jan 15, 2004 11:58:35 PM org.apache.jk.common.ChannelSocket init
INFO: JK2: ajp13 listening on /0.0.0.0:8009
Jan 15, 2004 11:58:35 PM org.apache.jk.server.JkMain start
INFO: Jk running ID=0 time=1/36  config=/opt/tomcat/conf/jk2.properties
Use a browser; URL:http://localhost:8080 and you should see something like this
5) Make sure that you have the following packages (or newer) installed on your build system:
- httpd-2.0.48-1.2
- httpd-devel-2.0.48-1.2
# yum install httpd httpd-devel
.....
.Dependencies resolved
I will do the following:
[install: httpd 2.0.48-1.2.i386]
[install: httpd-devel 2.0.48-1.2.i386]
I will install/upgrade these to satisfy the dependencies:
[deps: apr-util-devel 0.9.4-2.i386]
[deps: apr-util 0.9.4-2.i386]
[deps: apr 0.9.4-2.i386]
[deps: apr-devel 0.9.4-2.i386]
Is this ok [y/N]: y
...
#
6) There seams to be a bug in httpd-devel which make 'make mod_jk2' look for libtool in '/etc/httpd/build'
Redhat Bugzilla #113720
Apache Bugzilla #26206
For more information about this, read the description for the bug's. To get around this do:
# ln -s /usr/bin/libtool /etc/httpd/build/libtool
#
7) Download the tarball jarkarta-tomcat-connectors-jk2-2.0.2-src.tar.gz from http://www.apache.org/dist/jakarta/tomcat-connectors/jk2/source/ and save it in $HOME/rpmbuild/SOURCES.
Or if you have wget do
$ cd rpmbuild/SOURCES
$ wget http://www.apache.org/dist/jakarta
/tomcat-connectors/jk2/source/jakarta-tomcat-connectors-jk2-2.0.2-src.tar.gz
$
8) Download mod_jk2.spec and save it to rpmbuild/SPECS
9) The specfile will only work if TOMCAT_HOME is set
$ export TOMCAT_HOME=<where ever you installed tomcat>
$
10) In rpmbuild/SPECS run rpmbuild
$ cd ../SPECS
$ rpmbuild -ba mod_jk2.spec
Executing(%prep): /bin/sh -e /home/casper/rpmbuild/TMP/rpm-tmp.33213
+ umask 022
+ cd /home/cpedersen/rpmbuild//BUILD
+ LANG=C
+ export LANG
+ unset DISPLAY
+ '[' -z /opt/java ']'
+ '[' -z /opt/tomcat ']'
+ '[' '!' -x /etc/httpd/build/libtool ']'

.. omitted ..

Wrote: /home/casper/rpmbuild/SRPMS/mod_jk2-2.0.2-1.fc1.src.rpm
Wrote: /home/casper/rpmbuild/RPMS/i386/mod_jk2-2.0.2-1.fc1.i386.rpm

.. omitted ..
$
11) Now install the package
$ su
Password:
# rpm -ivh ../RPMS/i386/mod_jk2-2.0.2-1.fc1.i386.rpm
Preparing...                ########################################### [100%]
   1:mod_jk2                ########################################### [100%]
#
Not it is getting time to have a bit more fun....
Your Apache should already work (I hope), and we did a test of Tomcat earlier.12) Now restart Apache
# exit
$ su -
Password:
# service httpd restart
service httpd restart
Stopping httpd:                                            [  OK  ]
Starting httpd:                                            [  OK  ]
#
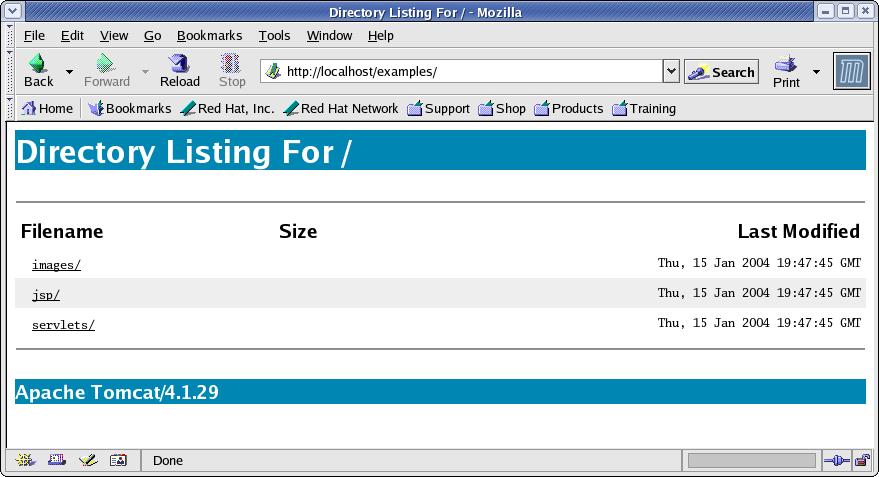
13) In a browser use this URL:http://localhost/examples and you should see something like this:

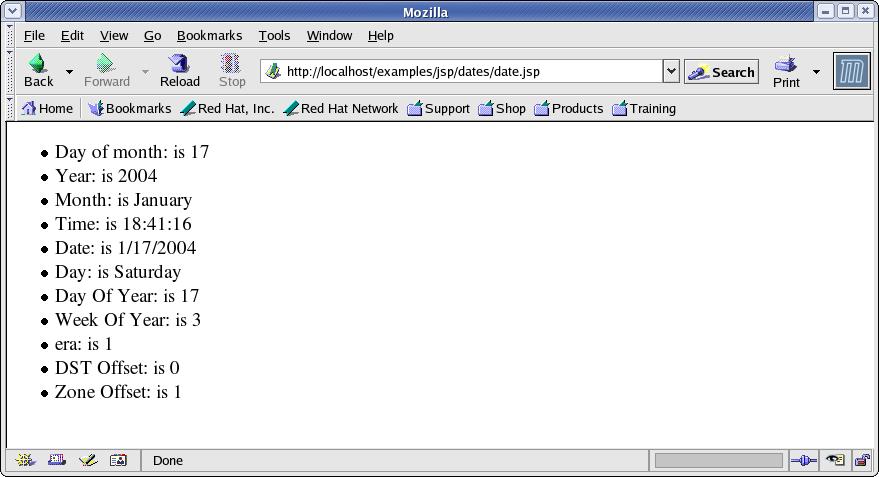
14) Now go to jsp and Execute Date URL:http://localhost/examples/jsp/dates/date.jsp and you should see this:

You should also try some of the other jsp pages, and also some of the servlets
Next, what did you actually do to your system...
15) So what did happen to your system.
The Apache configuration file (mod_jk2.conf) was created in /etc/httpd/conf.d
To do it this way allow you to create configuration files (for diffrent things) whichout having to modify the main configuration file.
A sample configuration (workers2.properties) file was created in /etc/httpd/conf.
This file for used by mod_jk2 to tell Apache what is available.
Try this URL:http://localhost/jkstatus - nice isn't it.
Jakarta Tomcat documentation
Homepage: http://jakarta.apache.org/tomcat/index.html
Tomcat documentation: http://jakarta.apache.org/tomcat/tomcat-4.1-doc/index.html
You will also find links to Apache's Servlet/JSP documentation here.
Tomcat Connectors documentation: http://jakarta.apache.org/tomcat/tomcat-4.1-doc/jk2/index.html
Sun's documentation
Java2 Enterprise Eddition Java Servlet technology
Technical Articles and Tips Articles: Servlets
Both of these are from 1997, but should give you an insite of the mystical world of Servlets.
JavaServer Technologies, Part I
JavaServer Technologies, Part II